


Ranking #1 in nearly every "favorite cookie" poll, the chocolate chip cookie is pretty much the go-to cookie of choice for both kids and grownups alike.
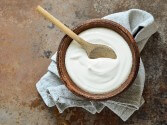
Basic Yogurt Cheese
- add review
- #27222

serves/makes:
ready in:
over 5 hrs
over 5 hrs
ingredients
2 cups low or non-fat yogurt
directions
Line a large strainer or colander with two or three layers of fine cheesecloth. Spoon yogurt into the center of the cloth. Gather the corners of the cloth and pull them up. Twist them together to form the yogurt into a tight ball in the center of the cloth. Fasten with a twist tie or rubber band near the ball.
Tie the remaining long ends of cheesecloth to a faucet or cupboard handle so that the whey can drip from the cheese. Let the cheese drip out for at least 6 hours or overnight, and be sure you have a bowl underneath to catch the liquid. The whey is full of nutrients and can be added to soups, sauces or vegetable dishes.
Put the yogurt ball in a strainer with a weight on top to force out even more liquid. Press down on the weight occasionally to remove the last bit of whey. Yogurt Cheese is ready when it is the solid consistency of cream cheese.
added by
nutrition data
18 calories, 0 grams fat, 2 grams carbohydrates, 1 grams protein per tablespoon. This recipe is low in sodium. This recipe is low in fat.


Love the spinach dip at restaurants like TGIFriday's and the Olive Garden? Make it at home with these easy-to-follow copycat recipes.

A can of cream of mushroom soup can be a real dinner saver. It works great in casseroles and can turn into a sauce or gravy in a pinch.

reviews & comments