cdkitchen > feeddaily blog
Halloween Recipes: Part 4, Sweet Treats
by Guest Writer, Valerie Whitmore[this is a repost from October 2012]
Jump to: Part 1 | Part 2 | Part 3 | Part 4 | Part 5
One of my favorite things about Halloween is the cute treats people and candy manufacturers come up with. I'm not that big on sweets usually, but I am a sucker for some adorable snacks.
For our Halloween taste testing event I just had to throw in a few kid-friendly sweet treats. As a kid I loved Rice Krispy treats. Ok, I love them as an adult too. So when I saw the recipe for Lizard Skins in our Halloween section I knew that was making it on our testing menu.
The recipe is a basic peanut butter cereal bar recipe. The added twist is that you add some lovely green food coloring to the mix. I stuck with the recipe up until the decorating/forming process. They didn't really strike me as looking like lizard skins. Lizards have legs - these didn't. Even though they are "skins" you'd still have an idea that they once covered legs. Ok, that's getting a little gross (and clearly showing I know more than I should about the reptile shedding process).
So I called them "snake skins" for our event. Instead of the raisins I used chocolate chips. I curved the strips of rice krispy bars into snake-y shapes.
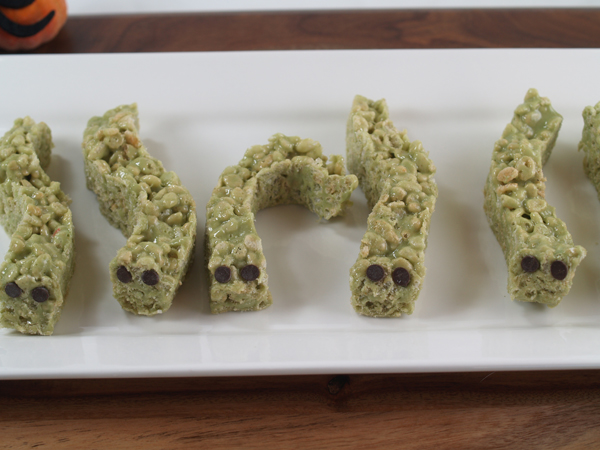
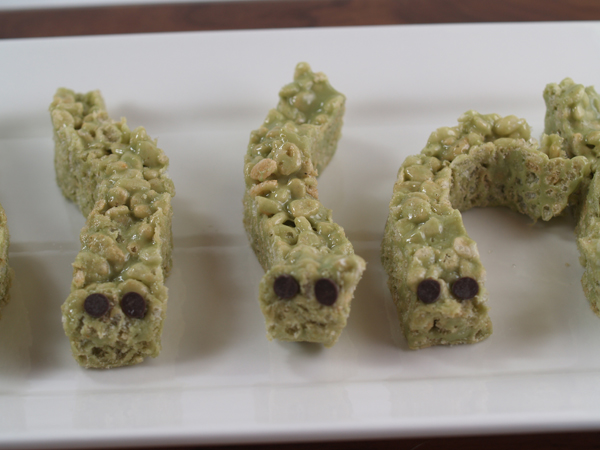
Not overly creepy, and definitely tasty
The other cute treat I picked is an oldie but goodie. The infamous Witches' Hats made from Keebler Fudge Stripe cookies that are turned upside down. A Hershey's Kiss is then glued onto the chocolate side of the cookie with some icing. Classic Halloween fun.
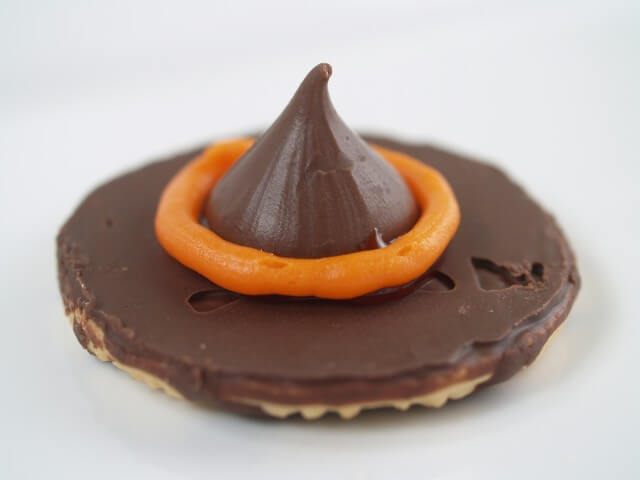
One note, make sure you get the decorator icing, not the gel. I bought the wrong thing by accident but fortunately had some of the orange icing on hand (see previous post about overabundance in CDK's pantry!).
I thought the hats would be difficult to eat. I had visions of having the roof of my mouth speared by the Hershey's Kiss. They actually were fine when sitting at room temperature. The kiss softened up so they were easy to scarf down
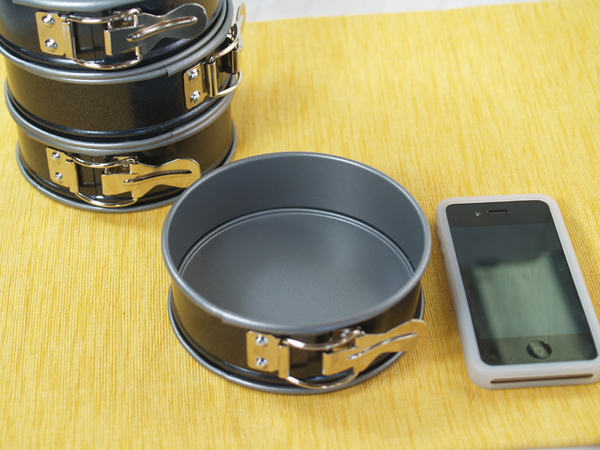
Of course, because I'm me, I had to have a decadent dessert to oooh and ahhh over as well. It had to stick with the Halloween-ish theme so I wanted something with pumpkin. I had seen some miniature springform pans on Amazon and instantly cheesecake came to mind.
One of the reasons our taste-testing events turn out so well is because I read the recipes thoroughly in advance - so I can anticipate problems and make sure I have all the necessary equipment on hand. Although, I admit, sometimes I skim them to get the highlights. This was one of those times.
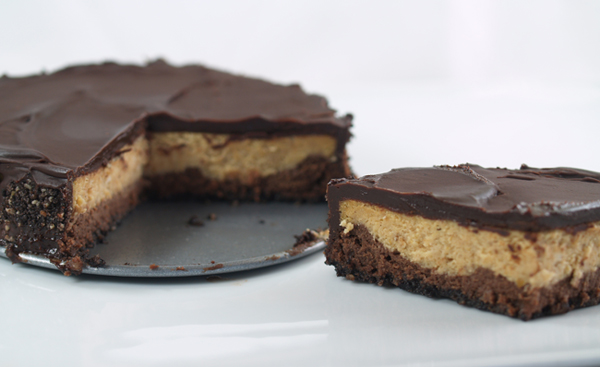
I knew a few of our taste-testers were big into chocolate-y desserts so the recipe for Dark Chocolate and Pumpkin Cheesecake sounded like a good choice. I had planned to make this recipe into miniature sized cheesecakes in the cute mini springform pans. What I overlooked in the recipe was that the pumpkin portion was actually baked in a cake pan and then fit on top of the chocolate layer. I had only purchased enough of the mini springform pans to handle the chocolate layer
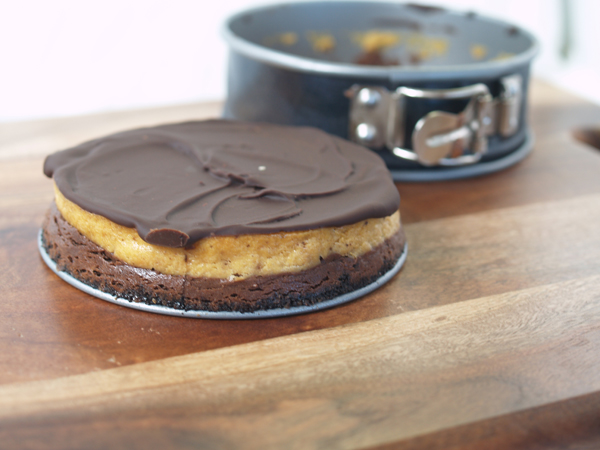
So I had to improvise. I made the recipe as directed up until the pumpkin layer, dividing everything between the mini pans instead of using a large size springform. For the pumpkin layer I made the batter as directed but layered it on top of the chocolate cheesecake batter in the pans. I then baked as directed but for just slightly less time, about an hour instead of the hour and ten minutes called for.
The recipe said to chill the chocolate layer but keep the pumpkin layer at room temperature. Obviously, I couldn't do that so I just chilled them. I made the ganache and then poured it over the pumpkin layer, while the cheesecakes were still in their pans. I then chilled them as directed and removed them from the pans.
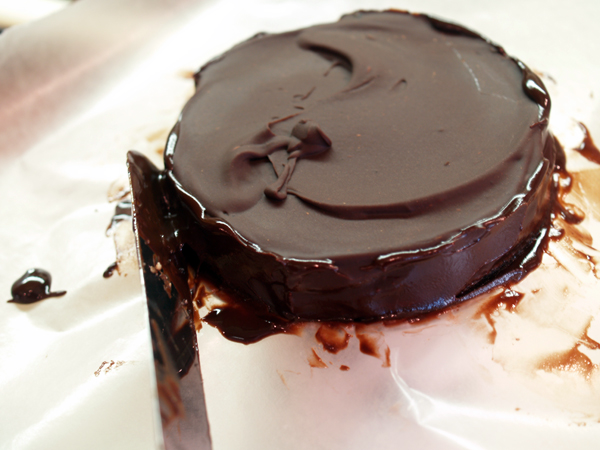
I covered the sides with the ganache and smoothed everything out.
And pressed the cookie crumbs around the edges.

I love how these turned out, despite having to improvise
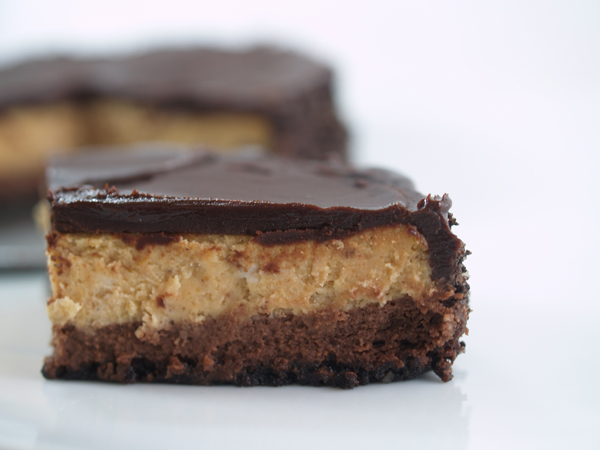
They were rich (VERY rich), and the pumpkin and dark chocolate were brilliant together. I would have liked a little more of the cookie crust in the bottom but it was hard to judge how much to put in since I was modifying the recipe
I have 2 leftover in the freezer. I fear they won't be there long since I know they are there. I wonder how many hours I would have to spend on the treadmill if I ate them both...
Jump to: Part 1 | Part 2 | Part 3 | Part 4 | Part 5
One of my favorite things about Halloween is the cute treats people and candy manufacturers come up with. I'm not that big on sweets usually, but I am a sucker for some adorable snacks.
For our Halloween taste testing event I just had to throw in a few kid-friendly sweet treats. As a kid I loved Rice Krispy treats. Ok, I love them as an adult too. So when I saw the recipe for Lizard Skins in our Halloween section I knew that was making it on our testing menu.
The recipe is a basic peanut butter cereal bar recipe. The added twist is that you add some lovely green food coloring to the mix. I stuck with the recipe up until the decorating/forming process. They didn't really strike me as looking like lizard skins. Lizards have legs - these didn't. Even though they are "skins" you'd still have an idea that they once covered legs. Ok, that's getting a little gross (and clearly showing I know more than I should about the reptile shedding process).
So I called them "snake skins" for our event. Instead of the raisins I used chocolate chips. I curved the strips of rice krispy bars into snake-y shapes.
Not overly creepy, and definitely tasty
The other cute treat I picked is an oldie but goodie. The infamous Witches' Hats made from Keebler Fudge Stripe cookies that are turned upside down. A Hershey's Kiss is then glued onto the chocolate side of the cookie with some icing. Classic Halloween fun.
One note, make sure you get the decorator icing, not the gel. I bought the wrong thing by accident but fortunately had some of the orange icing on hand (see previous post about overabundance in CDK's pantry!).
I thought the hats would be difficult to eat. I had visions of having the roof of my mouth speared by the Hershey's Kiss. They actually were fine when sitting at room temperature. The kiss softened up so they were easy to scarf down
Of course, because I'm me, I had to have a decadent dessert to oooh and ahhh over as well. It had to stick with the Halloween-ish theme so I wanted something with pumpkin. I had seen some miniature springform pans on Amazon and instantly cheesecake came to mind.
One of the reasons our taste-testing events turn out so well is because I read the recipes thoroughly in advance - so I can anticipate problems and make sure I have all the necessary equipment on hand. Although, I admit, sometimes I skim them to get the highlights. This was one of those times.
I knew a few of our taste-testers were big into chocolate-y desserts so the recipe for Dark Chocolate and Pumpkin Cheesecake sounded like a good choice. I had planned to make this recipe into miniature sized cheesecakes in the cute mini springform pans. What I overlooked in the recipe was that the pumpkin portion was actually baked in a cake pan and then fit on top of the chocolate layer. I had only purchased enough of the mini springform pans to handle the chocolate layer
So I had to improvise. I made the recipe as directed up until the pumpkin layer, dividing everything between the mini pans instead of using a large size springform. For the pumpkin layer I made the batter as directed but layered it on top of the chocolate cheesecake batter in the pans. I then baked as directed but for just slightly less time, about an hour instead of the hour and ten minutes called for.
The recipe said to chill the chocolate layer but keep the pumpkin layer at room temperature. Obviously, I couldn't do that so I just chilled them. I made the ganache and then poured it over the pumpkin layer, while the cheesecakes were still in their pans. I then chilled them as directed and removed them from the pans.
I covered the sides with the ganache and smoothed everything out.
And pressed the cookie crumbs around the edges.
I love how these turned out, despite having to improvise
They were rich (VERY rich), and the pumpkin and dark chocolate were brilliant together. I would have liked a little more of the cookie crust in the bottom but it was hard to judge how much to put in since I was modifying the recipe
I have 2 leftover in the freezer. I fear they won't be there long since I know they are there. I wonder how many hours I would have to spend on the treadmill if I ate them both...